Tag Archive for: location

Non Traditional Construction (Part 1)

The Laing Easiform
The Laing Easiform


These were constructed by John Laing builders with the first house being built in 1919. They are a fairly common form of construction – they were built by Councils in large estates as they were fairly cheap and quick to build.

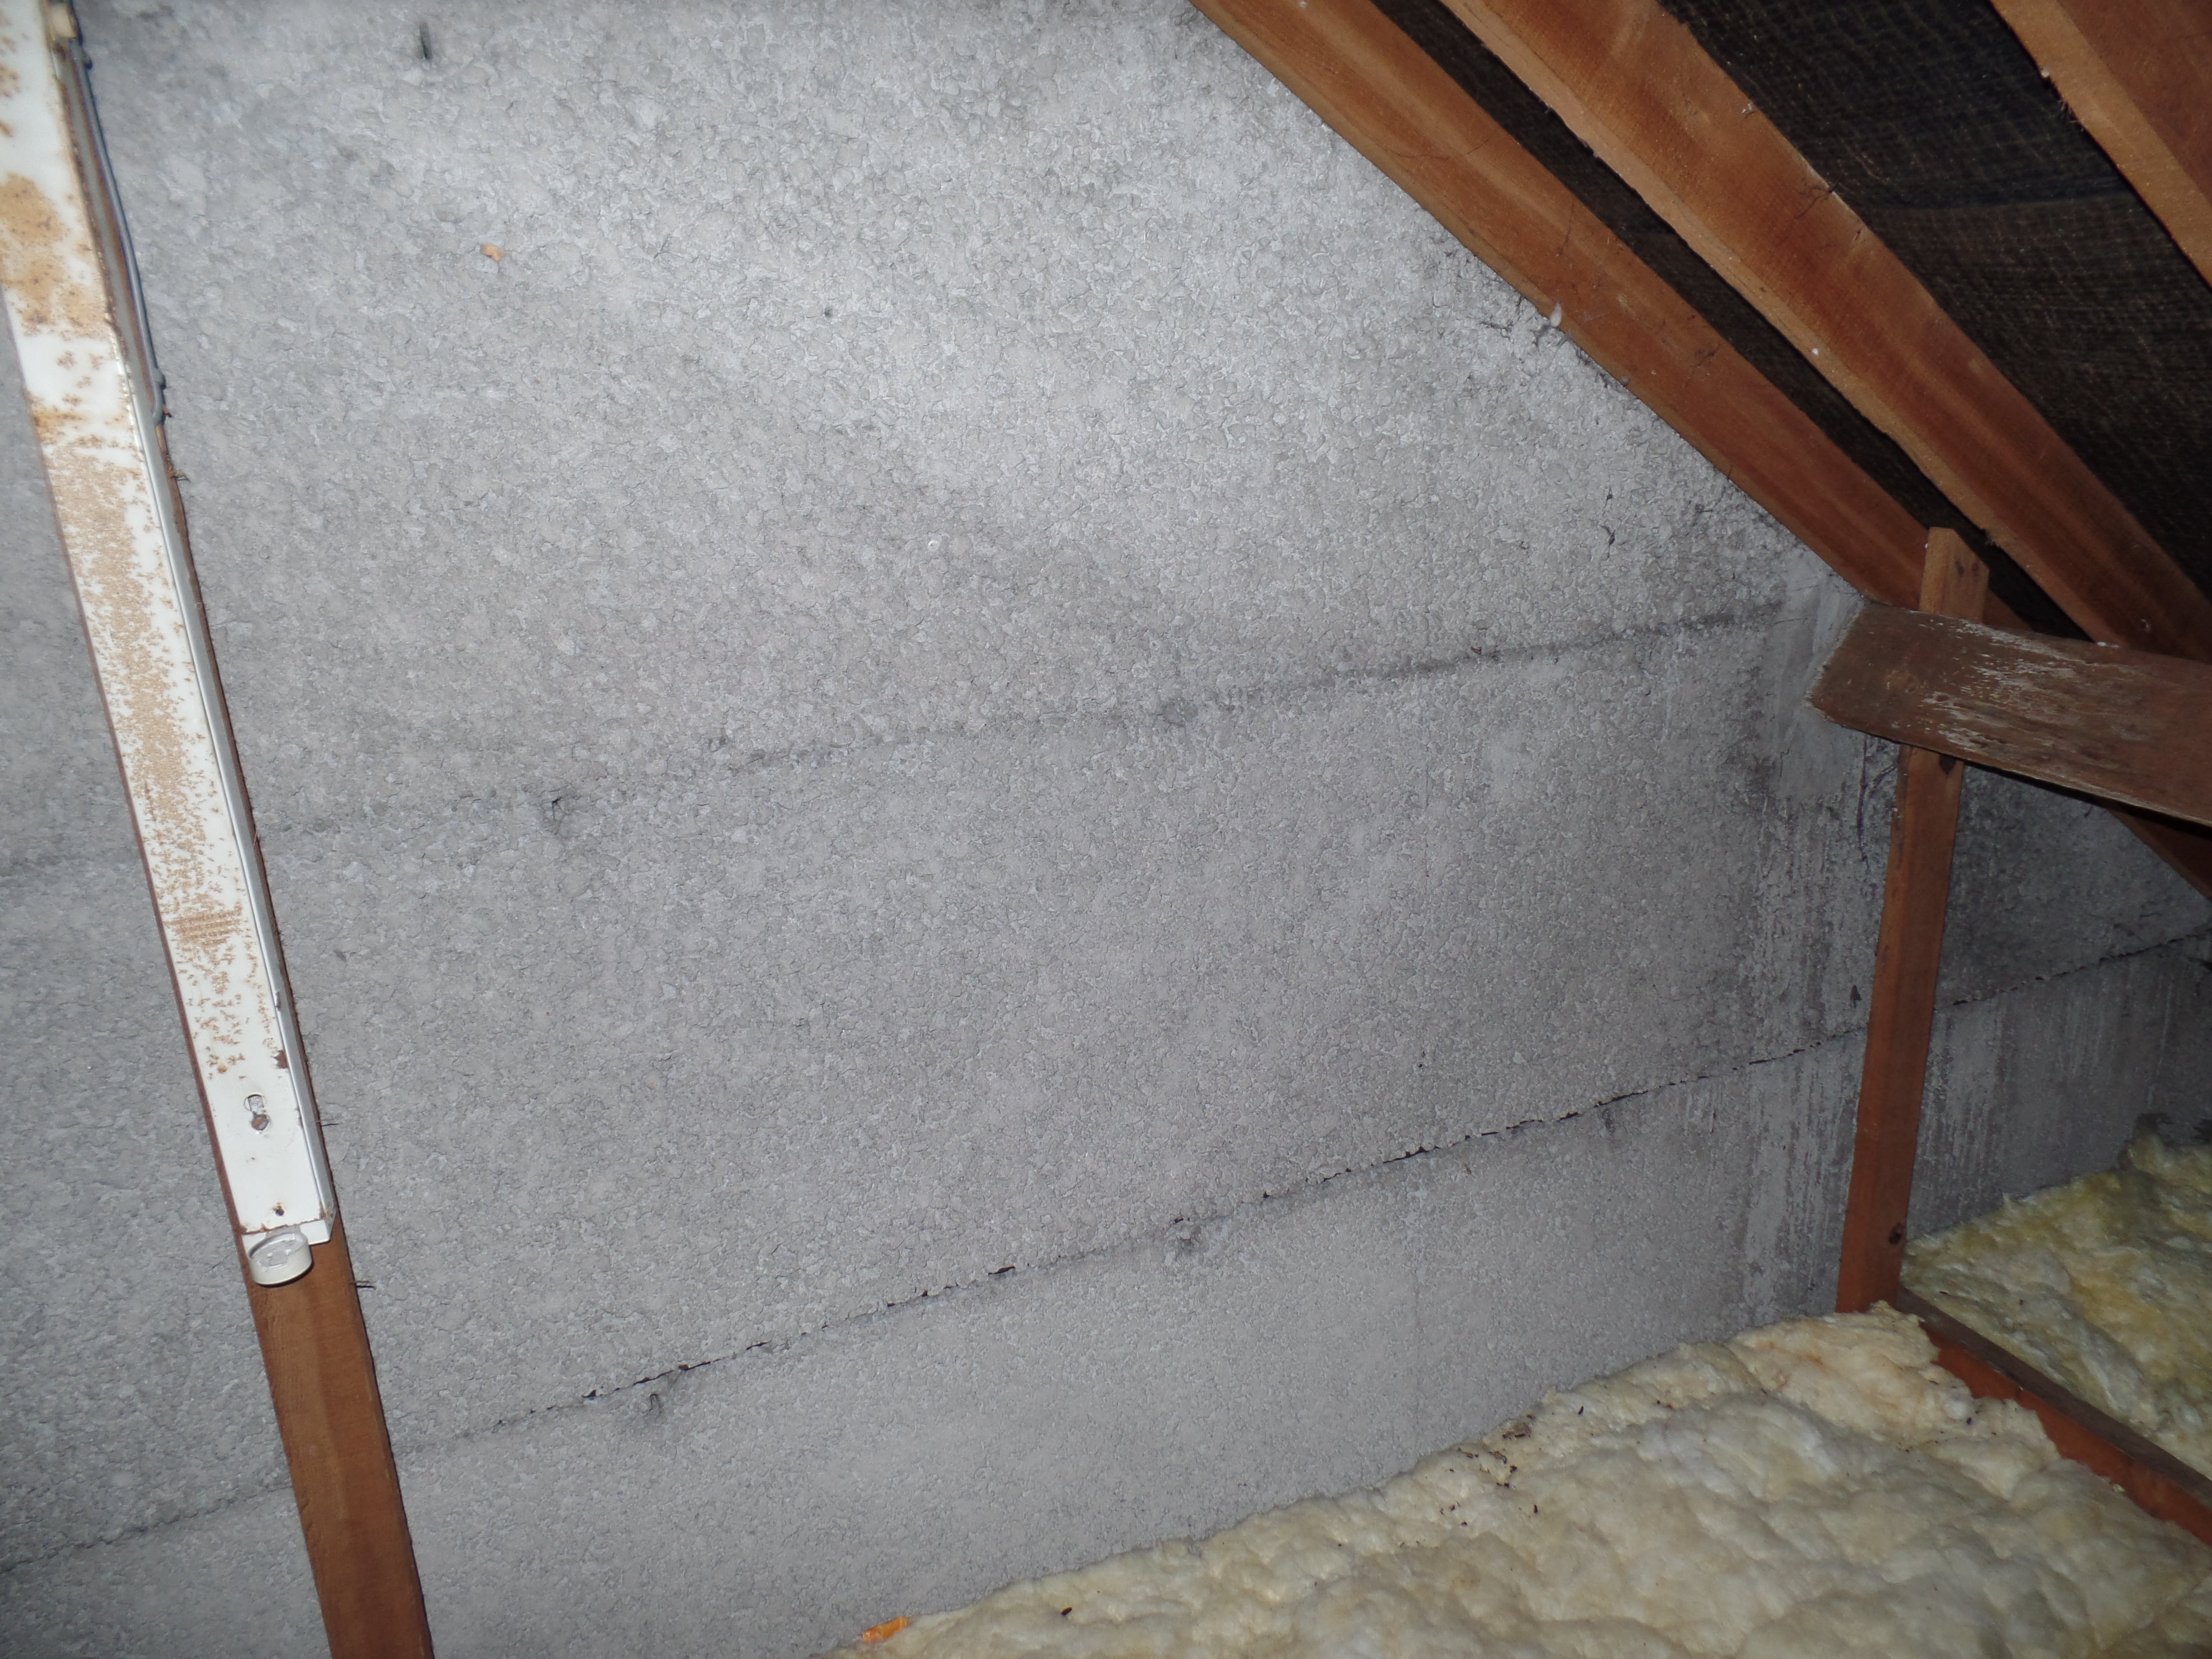
We have surveyed many Laing Easiforms in both Bristol and Gloucester. These dwellings can be identified by their tall slender chimney. The chimney tends to protrude from the central wall; however these chimneys often suffer from failure of the render and tend to crack. Laing Easiforms normally have a concrete porch roof above the front door. But the main way to confirm is by entering the loft space and looking at the party wall.This is not made of brick and block as in traditionally constructed houses, but is fairly smooth and grey in appearance.

How were they built?

Surveying these types of property can be a very satisfying experience as they were all constructed in a very similar way. A solid slab foundation was laid, then a mastic asphalt floor covering which acted as a damp proof course. After the floor was dry, metal shuttering was temporarily constructed and concrete was poured into this mould. This was strengthened with reinforcing bars. As these houses are not constructed from panels brought in from elsewhere, and the work is carried out on site, these are called in-situ. Once the concrete walls were in place, the shuttering was removed and the roof could be added. Normally a traditional cut-type roof was used with some bolted trusses to add strength, for instance those found in Brentry. A flat thick roof comprising a concrete slab was sometimes used, such as in Lockleaze.

What are the associated problems?

Laing Easiforms were not considered to be defective under the Housing Act and as a result can be mortgageable. Hence they are one of the few types of non traditional construction where a mortgage may be obtained! But With every rule there are the exceptions and the most common is the pre 1940’s Laing Easiform. Their construction had thinner walls, with 3” of poured in-situ concrete,  a 2” cavity and then a 3” inner skin – which is very thin by any standard. Some of these are still present in Lockleaze in Bristol and these are seldom mortgageable. The post-war properties were of  thicker walled construction, with  3 ½ ” concrete, a 2” cavity and a 3 ½” inner wall,  such as many of those found in Bishopsworth.

When we survey a Laing Easiform, one of the obvious problems is corrosion of the embedded metal. This is often characterised by horizontal cracking along the reinforcement lines. This may be repaired cost effectively depending on the extent of cracking that is apparent. It is a subjective call as to whether the extent of cracking is cost effective to repair; most suffer some level of cracking.

The other commonly occurring problem is the quantity of asbestos that is often used in the construction.For example, the soffits were originally of asbestos cement boarding, which has often been hidden by new UPVC. The loft hatches were again asbestos boarding, as were the under stairs cupboards. Many of the ducts and boxings-in were also cement type board and thermoplastic tiles were often used to finish the floor.

 

Pole Camera or Drone?

IS IT A SELFIE STICK?

Members of the public and vendors often see us with cameras on tall poles at the front of houses.  It’s strange to see a fully grown man with a giant “Selfie Stick” as lots of people call them!They are intrigued by what we are doing and ask questions.

We have been using pole or mast cameras on every Building Survey we’ve carried out since 2012.You can see us using a 6m mast in this early video.  Over the years we have continued to refine and develop the mast camera.  Now  they can be up to 15m high, as can be seen in this incarnation from 2013.

Over this time, the cameras mounted on the 10m fibreglass poles used by all our surveyors have really come a long way. They now have tilting, panning heads to allow us to look behind parapet walls and in other hidden places.They are also much lighter and easier to handle for safety.


WHAT ABOUT BINOCULARS?

Strangely, the uptake of this technology by surveying firms in the UK has been very limited.  We pioneered the technique in Bristol!  We are still the only firm in Bristol offering this as standard in our Building Surveys -not as an added extra at a premium cost. The others tend to look from ground level with binoculars, which isn’t going to provide a comprehensive view. You will not be able to see the tops of chimneys, second storey flat roofs or behind parapet walls. Nor into the valley or butterfly roofs that are very common in Bedminster, Clifton, Easton and Totterdown .

WHY NOT A DRONE?

The main question we are asked is why don’t you use a drone? The answer is that we don’t need to use more complicated access technology to gain a similar view.

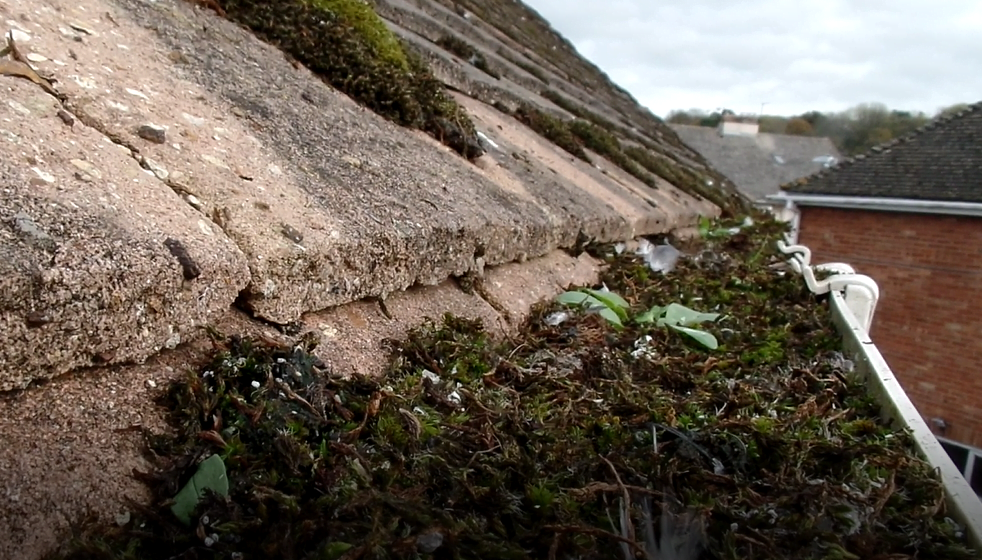
Most importantly, we need to view the sarking felt, which should lap into the gutters on a standard roof. This felt has often decayed just beneath the roof tiles; it is very rarely visible from ground level.  From taking the pole camera out of the car and setting it up, we can see this area within a few minutes.  Setting up a drone takes time.  Imagine manoeuvring it into place to hover right next to the tiles.  Getting the camera perched in the gutter looking upwards. This manoeuvre would require significanttime and skill.  And the potential for tile or gutter damage by the drone is a possibility!

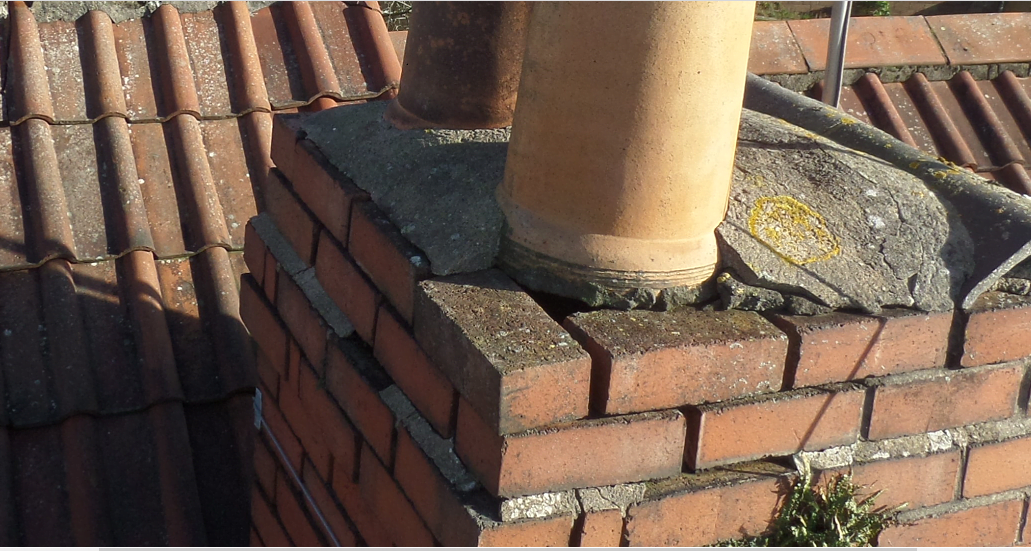
The pole camera allows us to see the tops of chimney stacks and also the tops of parapet walls. It also shows other areas of complex roofs that we want to inspect in detail.  So why complicate the process by using a battery powered vehicle that cannot be used under certain conditions?Only the very expensive models can operate when there is high wind or excessive rain or in certain geographical areas.


THE POLE CAN GO WHERE DRONES CANNOT

This should be seen in the wider context of drone use. The current call for registering and licensing drone pilots would add another layer of cost and complexity. This is not warranted in the surveying of residential property. We would not be able to use of them near Bristol airportor sensitive sites such as the MoD. There are also the general privacy concerns. Our cameras only look at the house we are surveying, not at the back gardens of an entire street. Hence our camerasdon’t cause alarm to people sunbathing in what they though was the privacy of their back gardens!

The real skill lies not in taking the picture, but in being able to analyse what the picture means…


Gutters

Examining gutters and downpipes

Background

The UK is a wet place as we all know!  The Bristol area averages around 800-900 mm of rainfall a year, which is slightly above the UK average. Even more rain fell in recent years such as 2012 with weather conditions changing. Interestingly, in the past, South Bristol has been wetter than North Bristol.

So this rainwater must be diverted from your roof into your gutters, on its way to the drains. Gutters don’t just remove rainwater, they are an integral part of the house design and character!

They should prevent water from penetrating the tops of the walls and leaking gutters can often cause dampness problems. Furthermore, this is sometimes wrongly diagnosed as rising damp and a large inappropriate repair bill follows – although just replacing the gutters would have solved the problem.

Materials  and Styles

Gutters have traditionally been made from many different materials. Historically, timber has often been used in the north of England, usually lined with lead. More common to Victorian era housing is cast iron and this is prone to rusting. In older properties, especially around South Bristol and Clifton, the gutters may be hidden behind parapet walls at the front of the property. Some Bristol properties have ‘butterfly’ roofs, where the gutters run in a valley hidden behind this parapet. Hence in such cases, inspection from ground level is impossible.

More recent  gutters can be made from asbestos type cement, which therefore will be expensive to remove. Fortunately,   you can carry out a simple check for asbestos gutters and pipework with a magnet;  see our  video https://youtu.be/tfihb5NdZRk . Recently, some gutters, especially long runs, have been made from extruded metal, usually aluminium, but the most popular material is UPVC – ‘plastic’ guttering.

What to look for?

Gutters

Now, you are looking for evidence of leakages and blockages.

Can you see any organic growth sprouting out of the gutters? That’s a sure sign that maintenance has been poor. Are there any overhanging trees whose leaves may have blocked the gutters in autumn?

Next, stand back from the building to check that the gutters are set to the correct falls. They should run in a straight horizontal line towards the downpipe with no dip or deviation.

Rainwater Goods Fastenings

Gutters should normally have supporting clips  spaced at around 750 mm apart. Since the average man’s footstep is around 780 mm, you can pace the length of the gutter with an “average” man and there should be 1 clip per footstep. However, if sufficient clips are not present, the gutters can twist or bow or sag. When this happens, the correct fall is lost and they will start to leak as the weight of water causes pressure which damages the joints.

The joints between the lengths of gutter are usually located at the clips. Hence this is an easy place to look for heavily stained or soiled clips, suggesting leaks in these areas. And if a gutter has been leaking for a long time, stalactites may have formed on the underside of the gutter where water has been dripping. Another great giveaway is staining to the wall; this normally takes the form of darker streaks or patches or green algae or moss growth on the wall. Take note, because this will certainly indicate problems not only with the rainwater goods but potentially inside the property as well.

However,unless you can find a high level vantage point, you won’t be able to see inside the gutters; we use mast cameras as standard on our building surveys to check for blockages and detritus in the gutters.

Downpipes

Now look at the junctions connecting  the gutter to the downpipe; these often incorporates an arrangement of curved sections. These joints are not normally supported by clips and are vulnerable to movement hence they are always susceptible to leakage. Again, this is a very common fault so look for moss growth or staining around the joints.

The downpipes should have clips securing them every 1.8 m. Again the average man is around 175 cm in height so this is a good datum. Downpipes often become blocked with moss and other detritus. So give them a knock to see if they sound hollow; if a dull sound is heard, then they may be full of moss and need to be cleared out.

The modern UPVC extruded parts for guttering and downpipes are very cheap to buy and the largest cost with installation is normally the labour element. As a result extensive repairs to gutters are normally a bad idea! Simply replacing them and obtaining a longer life is usually a better use of your money.

Where does that water go?

Lastly, are there any water butts at the foot of the downpipes? If so, are they overflowing into the foundations of the property? Do the downpipes lead into drains or do they splash their contents over the ground beneath, encouraging dampness, especially around bay windows ? We deal with dampness in another section, but the condition and design of the rainwater goods can give you some valuable pointers!


Chimney

chimney 2

Chimneys


Chimneys and their pots come in many shapes and sizes. Some are easy to view, others less so. Chimneys can be costly to repair because access is awkward and expensive as scaffolding is usually required.The main problem with chimneys is their propensity to allow dampness into the property.

Simple Checks

  • Have a look at the top of the stack – can you see any chimney pots present? if not they may have been removed and not capped off – in Bristol there are lots of open chambers where the pots have been removed and rainwater can run straight down inside the stack.
  • Now run your eye down the stack, looking for any obvious failures in the pointing, (missing pieces of the mortar that bonds the brickwork together). The pointing should be in good condition to prevent penetrating dampness and to shed rainwater down the surface of the bricks (or stone) and away onto the roof. Older stacks are likely to be pointed with lime mortar rather than sand & cement. In Bristol, Buddleia are often found growing from the lime pointing of the stack or from parapet walls and the roots can cause damage to the brickwork
  • Next, stand directly in line with the stack in front of the chimney and see if it leans. Whilst some misalignment may be acceptable due to prevailing winds, even a slight lean may signal a defect with the roof below or the condition of the brickwork.

You are unlikely to be able to see clearly the very top of the stack, the cement holding the pots in place (flaunching), the lead flashing surrounding the stack and the actual condition of the chimney pots or caps, but we can help. We always use our mast cameras as standard when undertaking our full building survey to help us inspect in detail the parts you cannot see.(https://www.youtube.com/watch?v=balBNOI64k0)